Cómo crear un template para InfluxDB v2

Desde hace un mes que vengo colaborando activamente en generar templates para la nueva versión de InfluxDB que por ahora esta en Beta. En este artículo, vamos a crear "juntos" un template de Postgresql y te muestro como es el proceso.
Este artículo, lo escribí a medida que iba armando este template, como para que también sea de guía para quienes quieran colaborar en este proyecto.
Los templates que han sido creados, los pueden encontrar en este Github, están ya listos para importar y usar:
Nota importante: Cuando mencionamos templates, no es solamente el dashboard en donde visualizamos los datos, sino que también se suele incluir más elementos, como labels, buckets (donde se guarda la información) y configuración de Telegraf.
Arrancamos
A la hora de elegir hacer un template u otro, lo primero que hago es mirar los Input Plugins que tiene Telegraf. Para eso, le pego una mirada a el Github del proyecto y reviso, que cosas es capaz de monitorear Telegraf y que Template falta.
Para este caso, como comenté más arriba, vamos a monitorear un Postgresql. Si vieron el Streaming del viernes pasado en Twitch, vieron que instale uno para usar con NextCloud, así vamos a usar ese mismo.
Por supuesto, es imprescindible correr una instancia de InfluxDB v2. Si, no la tienen, pueden pegarle una mirada a este artículo que escribí al respecto:

Armando todo para monitorear
Ya esta mi Postgresql andando y lo siguiente que debo hacer es, entender, como esta solución de base de datos expone métricas, para que luego con Telegraf, poder llevarla a InfluxDB.
En el caso de PSQL es muy sencillo, solo con pegarle al host y al puerto 5432 con Telegraf es suficiente para tener acceso a esas métricas.
Lo siguiente que voy a hacer es crear un bucket en mi instancia de InfluxDB. Esto, se hace desde Load Data/Buckets, luego asigno una label a ese recurso llamada "postgres".
Lo siguiente es crear el Output para comenzar a armar el archivo de configuración de Telegraf, lo vamos a llamar psql.conf y además también le vamos a sumar el Input Plugin de Postgresql, así como también de monitoreos de sistemas, tales como CPU y Disco. Más o menos queda así (Sin las métricas de sistema):
 [[outputs.influxdb_v2]]
  ## The URLs of the InfluxDB cluster nodes.
  ##
  ## Multiple URLs can be specified for a single cluster, only ONE of the
  ## urls will be written to each interval.
  ## urls exp: http://127.0.0.1:9999
  urls = ["http://localhost:9999"]

  ## Token for authentication.
  token = "$INFLUX_TOKEN"

  ## Organization is the name of the organization you wish to write to; must exist.
  organization = "data"

  ## Destination bucket to write into.
  bucket = "postgres"

  [agent]
  interval = "1m"

 [[inputs.postgresql]]
  address = "postgres://postgres:mysecretpassword@localhost:5432"
  ignored_databases = ["template0", "template1"]
Lo siguiente que debo de hacer y esto es antes de iniciar el Telegraf, es pasar como variable de entorno el token para poder conectarme a InfluxDB y escribir sobre ese bucket.
Esto lo hago de la siguiente manera (deben cambiar "mi-token" por efectivamente el token que van a sacar desde "load data/tokens"):
export INFLUX_TOKEN=<mi-token>Una vez hecho esto, estoy listo para probar correr Telegraf.
Comenzando a Monitorear
Esta todo listo, ahora vamos a comenzar y vamos a ejecutar Telegraf con el modo debug para que nos imprima el detalle de lo que hace. Esto nos va a servir para tener claramente información sobre si funciona o no.
telegraf --config psql.conf --debugEl resultado es este y como vemos, todo anda de primera:
2020-06-12T14:38:35Z I! Starting Telegraf 1.14.3
2020-06-12T14:38:35Z I! Loaded inputs: postgresql
2020-06-12T14:38:35Z I! Loaded aggregators:
2020-06-12T14:38:35Z I! Loaded processors:
2020-06-12T14:38:35Z I! Loaded outputs: influxdb_v2
2020-06-12T14:38:35Z I! Tags enabled: host=thelab
2020-06-12T14:38:35Z I! [agent] Config: Interval:1m0s, Quiet:false, Hostname:"thelab", Flush Interval:10s
2020-06-12T14:38:35Z D! [agent] Initializing plugins
2020-06-12T14:38:35Z D! [agent] Connecting outputs
2020-06-12T14:38:35Z D! [agent] Attempting connection to [outputs.influxdb_v2]
2020-06-12T14:38:35Z D! [agent] Successfully connected to outputs.influxdb_v2
2020-06-12T14:38:35Z D! [agent] Starting service inputs
2020-06-12T14:38:50Z D! [outputs.influxdb_v2] Buffer fullness: 0 / 10000 metrics
2020-06-12T14:39:00Z D! [outputs.influxdb_v2] Buffer fullness: 0 / 10000 metrics
2020-06-12T14:39:10Z D! [outputs.influxdb_v2] Wrote batch of 2 metrics in 145.099172ms
Si voy a InfluxDB a la sección "Data Explorer" y selecciono el Bucket "postgres" y ya veo "measurements" y "_fields"

Esto quiere decir, que ya estoy teniendo datos, así que ahora voy a armar el dashboard.
¡Quiero ver esos datos!
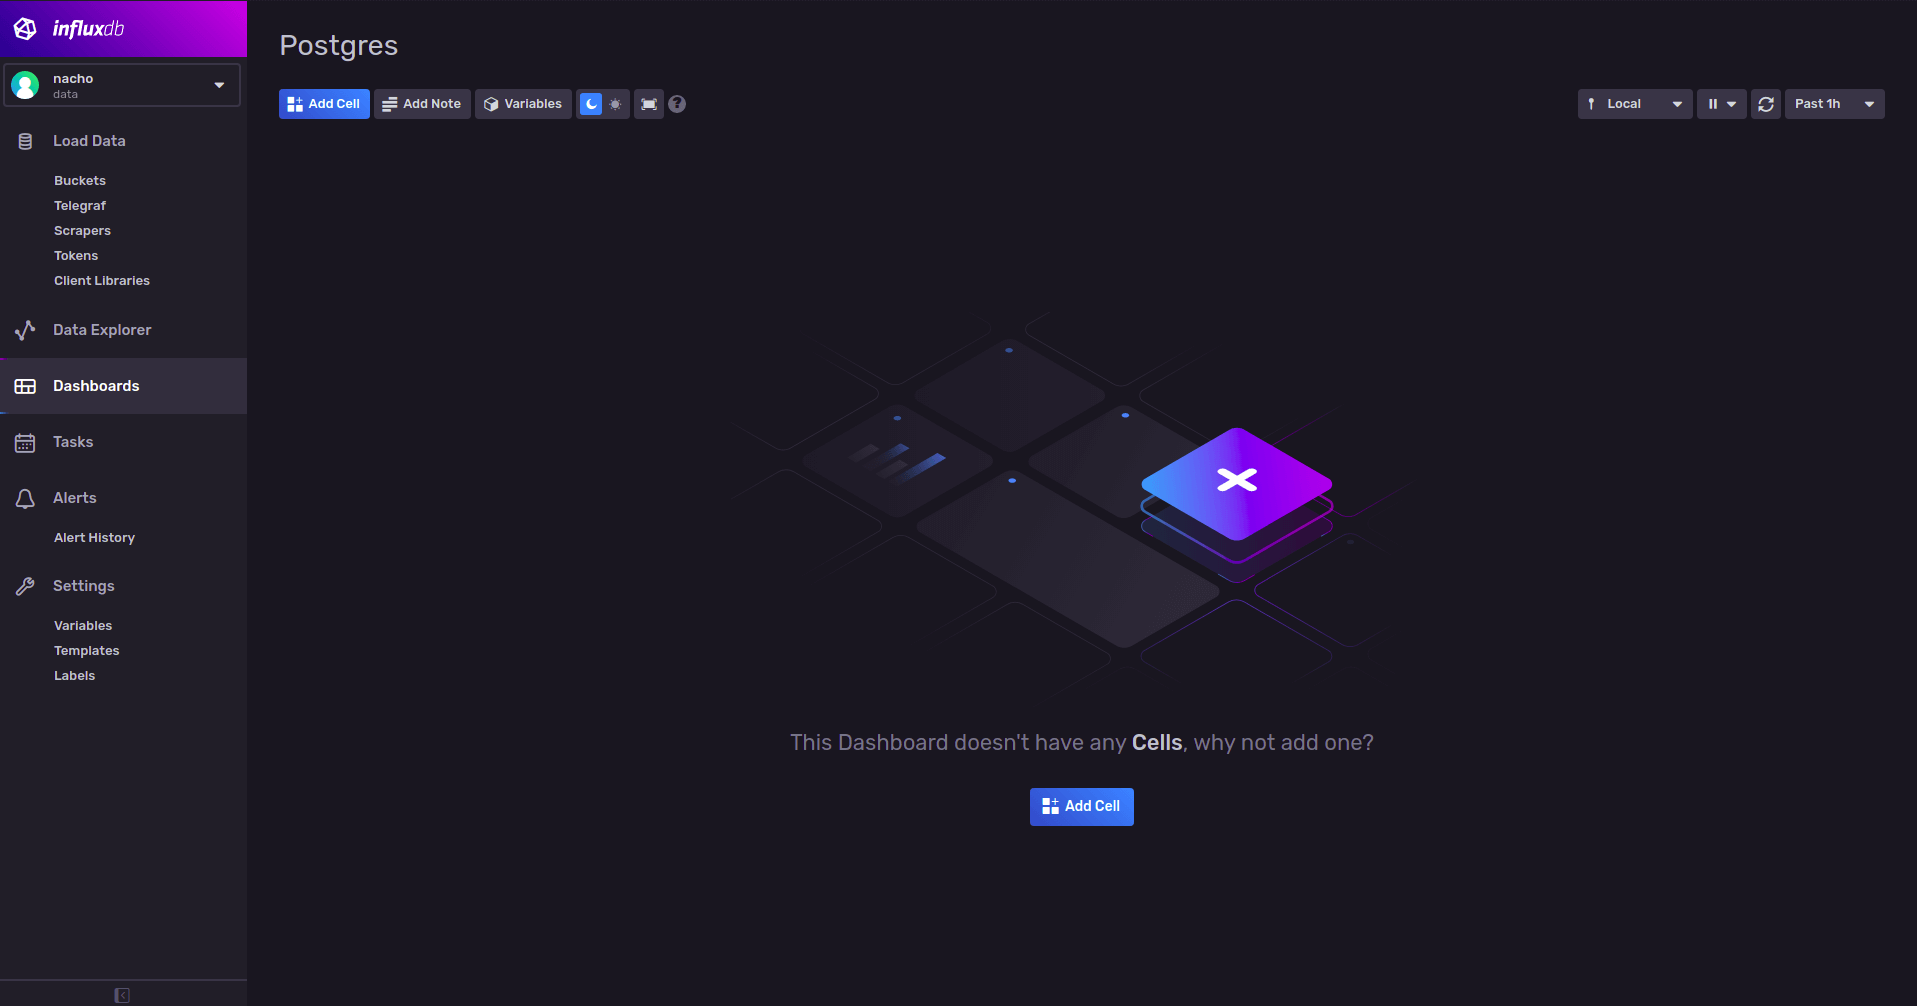
Ya estamos listos para crear un dashboard y traer datos. Lo primero que hago, es ir a "dashboard" y luego "Create Dashboard", le asigno un nombre y la label "postgres" que ya habíamos definido también para el "bucket".

Lo siguiente que suelo hacer es ver otros dashboards, por ejemplo, los de Grafana para ver cómo están armados y que información es importante graficar. En mi caso, también aporto un montón haber visto la sección de "monitoreo" de postgres en su sitio.
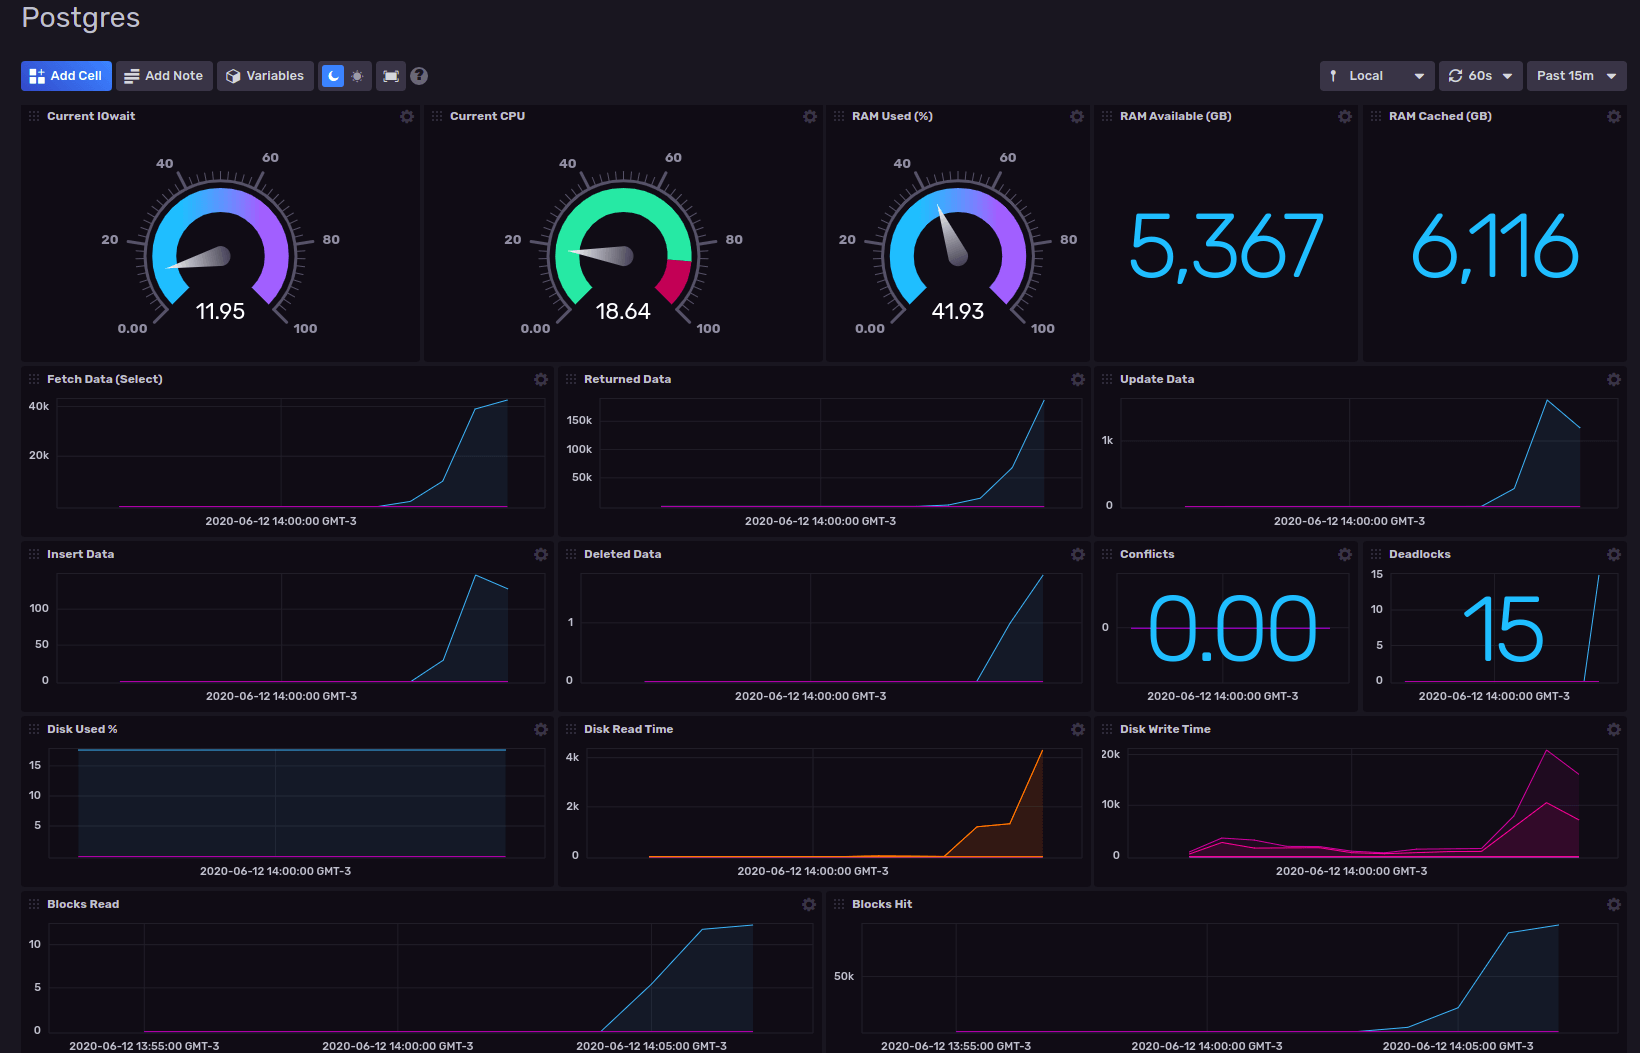
Después de un rato jugando, ajustando y demás, el dashboard, paso a ser esto:

Ahora bien, ya tenemos el dashboard. Vamos a exportarlo e integrarle la configuración de Telegraf.
Empaquetado del template
Cuando hablo de exportar el template, no solo hablo del dashboard, sino también del bucket, la configuración de Telegraf y labels, para que el que quiera usar este template, solo necesite ejecutar un comando para importar todo esto:
La exportación es muy sencilla, en mi caso, como mi InfluxDB esta corriendo en Docker, debo ejecutarlo así:
docker exec -it 4d410b0f82ba influx pkg export all --filter labelName=postgres -f postgres.yml -o data -t $INFLUX_TOKEN
Luego, debo sacar este archivo fuera del contenedor para agregarle la configuración de Telegraf.
docker cp 4d410b0f82ba:/postgres.yml .En mi caso, uso VSCodium pero pueden usar cualquier otro editor de texto, tengan en cuenta, que es un YML, con lo cual, la identación es más que importante.
El archivo que acabo de exportar se ve más o menos así (es un extracto):
apiVersion: influxdata.com/v2alpha1
kind: Label
metadata:
    name: flamboyant-dubinsky-332001
spec:
    color: '#F95F53'
    name: postgres
---
apiVersion: influxdata.com/v2alpha1
kind: Bucket
metadata:
    name: vivid-heisenberg-732003
spec:
    associations:
      - kind: Label
        name: flamboyant-dubinsky-332001
    name: postgres
---
apiVersion: influxdata.com/v2alpha1
kind: Dashboard
metadata:
    name: jovial-montalcini-f32001
spec:
    associations:
      - kind: Label
        name: flamboyant-dubinsky-332001
    charts:
      - colors:
          - hex: '#00C9FF'
            name: laser
            type: min
          - hex: '#9394FF'
            name: comet
            type: max
            value: 100
        decimalPlaces: 2
        height: 3
        kind: Gauge
        name: Current IOwait
        queries:
          - query: |-
                from(bucket: "postgres")
                  |> range(start: v.timeRangeStart, stop: v.timeRangeStop)
                  |> filter(fn: (r) => r["_measurement"] == "cpu")
                  |> filter(fn: (r) => r["_field"] == "usage_iowait")
...
Al final del archivo, vamos a agregar la configuración de Telegraf y necesitamos depurar esa configuración para que cuando el usuario que vaya a importarlo y usarlo, pueda definir sus datos como variables de entorno. Entonces, lo que antes era el nombre del Bucket o el nombre de la organización lo reemplazamos con una variable. La config quedaría así:
...
---

apiVersion: influxdata.com/v2alpha1
kind: Telegraf
metadata:
    name: postgres-config
spec:
    config: |

        [[outputs.influxdb_v2]]
          ## The URLs of the InfluxDB cluster nodes.
          ##
          ## Multiple URLs can be specified for a single cluster, only ONE of the
          ## urls will be written to each interval.
          ## urls exp: http://127.0.0.1:9999
          urls = ["$INFLUX_HOST"]

          ## Token for authentication.
          token = "$INFLUX_TOKEN"

          ## Organization is the name of the organization you wish to write to; must exist.
          organization = "$INFLUX_ORG"

          ## Destination bucket to write into.
          bucket = "$INFLUX_BUCKET"

          [agent]
          interval = "1m"

        [[inputs.postgresql]]
          # address = "postgres://postgres:mysecretpassword@localhost:5432"
          address = "$PSQL_STRING_CONNECTION"
          ignored_databases = ["template0", "template1"]

        [[inputs.cpu]]
          ## Whether to report per-cpu stats or not
          percpu = true
          ## Whether to report total system cpu stats or not
          totalcpu = true
          ## If true, collect raw CPU time metrics.
          collect_cpu_time = false
          ## If true, compute and report the sum of all non-idle CPU states.
          report_active = false

        [[inputs.disk]]
          ## By default stats will be gathered for all mount points.
          ## Set mount_points will restrict the stats to only the specified mount points.
          # mount_points = ["/"]

          ## Ignore mount points by filesystem type.
          ignore_fs = ["tmpfs", "devtmpfs", "devfs", "iso9660", "overlay", "aufs", "squashfs"]

        # Read metrics about disk IO by device
        [[inputs.diskio]]
          ## By default, telegraf will gather stats for all devices including
          ## disk partitions.
          ## Setting devices will restrict the stats to the specified devices.
          # devices = ["sda", "sdb"]
          ## Uncomment the following line if you need disk serial numbers.
          # skip_serial_number = false
          #
          ## On systems which support it, device metadata can be added in the form of
          ## tags.
          ## Currently only Linux is supported via udev properties. You can view
          ## available properties for a device by running:
          ## 'udevadm info -q property -n /dev/sda'
          ## Note: Most, but not all, udev properties can be accessed this way. Properties
          ## that are currently inaccessible include DEVTYPE, DEVNAME, and DEVPATH.
          # device_tags = ["ID_FS_TYPE", "ID_FS_USAGE"]
          #
          ## Using the same metadata source as device_tags, you can also customize the
          ## name of the device via templates.
          ## The 'name_templates' parameter is a list of templates to try and apply to
          ## the device. The template may contain variables in the form of '$PROPERTY' or
          ## '${PROPERTY}'. The first template which does not contain any variables not
          ## present for the device is used as the device name tag.
          ## The typical use case is for LVM volumes, to get the VG/LV name instead of
          ## the near-meaningless DM-0 name.
          # name_templates = ["$ID_FS_LABEL","$DM_VG_NAME/$DM_LV_NAME"]

        # Read metrics about memory usage
        [[inputs.mem]]
          # no configuration
Para asegurarme de que este todo bien, lo siguiente que hago es intentar importarlo. En mi caso, copio el archivo postgres.yml ya con la config de Telegraf al contenedor y ejecuto:
docker exec -it 4d410b0f82ba influx pkg -f postgres.yml -o data -t $INFLUX_TOKENSi todo sale bien, debería responderme con algo más o menos así, que será lo que me confirme que el template es totalmente válido.
LABELS    +add | -remove | unchanged
+-----+----------------------------+------------------+---------------+---------+-------------+
| +/- |        PACKAGE NAME        |        ID        | RESOURCE NAME |  COLOR  | DESCRIPTION |
+-----+----------------------------+------------------+---------------+---------+-------------+
|     | flamboyant-dubinsky-332001 | 05d639e9629a9000 | postgres      | #F95F53 |             |
+-----+----------------------------+------------------+---------------+---------+-------------+
|                                                                        TOTAL  |      1      |
+-----+----------------------------+------------------+---------------+---------+-------------+

BUCKETS    +add | -remove | unchanged
+-----+-------------------------+------------------+---------------+------------------+-------------+
| +/- |      PACKAGE NAME       |        ID        | RESOURCE NAME | RETENTION PERIOD | DESCRIPTION |
+-----+-------------------------+------------------+---------------+------------------+-------------+
|     | vivid-heisenberg-732003 | 05d639b5fdf32000 | postgres      | 0s               |             |
+-----+-------------------------+------------------+---------------+------------------+-------------+
|                                                                         TOTAL       |      1      |
+-----+-------------------------+------------------+---------------+------------------+-------------+

DASHBOARDS    +add | -remove | unchanged
+-----+--------------------------+----+---------------+-------------+------------+
| +/- |       PACKAGE NAME       | ID | RESOURCE NAME | DESCRIPTION | NUM CHARTS |
+-----+--------------------------+----+---------------+-------------+------------+
| +   | jovial-montalcini-f32001 |    | Postgres      |             | 17         |
+-----+--------------------------+----+---------------+-------------+------------+
|                                                          TOTAL    |     1      |
+-----+--------------------------+----+---------------+-------------+------------+

TELEGRAF CONFIGURATIONS    +add | -remove | unchanged
+-----+-----------------+----+-----------------+-------------+
| +/- |  PACKAGE NAME   | ID |  RESOURCE NAME  | DESCRIPTION |
+-----+-----------------+----+-----------------+-------------+
| +   | postgres-config |    | postgres-config |             |
+-----+-----------------+----+-----------------+-------------+
|                                   TOTAL      |      1      |
+-----+-----------------+----+-----------------+-------------+

LABEL ASSOCIATIONS    +add | -remove | unchanged
+-----+---------------+--------------------------+---------------+------------------+----------------------------+------------+------------------+
| +/- | RESOURCE TYPE |  RESOURCE PACKAGE NAME   | RESOURCE NAME |   RESOURCE ID    |     LABEL PACKAGE NAME     | LABEL NAME |     LABEL ID     |
+-----+---------------+--------------------------+---------------+------------------+----------------------------+------------+------------------+
|     | buckets       | vivid-heisenberg-732003  | postgres      | 05d639b5fdf32000 | flamboyant-dubinsky-332001 | postgres   | 05d639e9629a9000 |
+-----+---------------+--------------------------+---------------+------------------+----------------------------+------------+------------------+
+-----+---------------+--------------------------+---------------+------------------+----------------------------+------------+------------------+
| +   | dashboards    | jovial-montalcini-f32001 | Postgres      |                  | flamboyant-dubinsky-332001 | postgres   | 05d639e9629a9000 |
+-----+---------------+--------------------------+---------------+------------------+----------------------------+------------+------------------+
|                                                                                                                    TOTAL    |        2         |
+-----+---------------+--------------------------+---------------+------------------+----------------------------+------------+------------------+
Para ir cerrando
Este es mi proceso para crear un template para InfluxDB, espero que te haya servido.
Si estás con ganas de contribuir, después de esto, podés leer las guías de contribución y hacer un PR al github Community Templates de InfluxData.
¿Dudas o consultas? por favor, no dudes en dejarla en los comentarios.


