A few days ago I decided to update my website, this website is HTML, Bootstrap, CSS, and some Javascript. A static website that can be hosted anywhere and in this post, you are going to learn how to host it in S3 using CloudFront to deliver the content.
I have the website in Github, so, if you are looking for a template for your website, feel free to grab what is useful to you.
 xe-nvdk
Introduction:
Originally, my website was running in a docker container, standalone, with no integration with deployment tools at all. For any modification required download the updated code, update the volumes in the container, and then restart the container. This is something barbaric for the times that we are living.
So, in these times when I'm defining the next step in my career I decided to update my website and "fix" for good how to deploy new changes.
Architecture
This is the architecture of the solution proposed. Looks like overkill but isn't. Is quite simple.
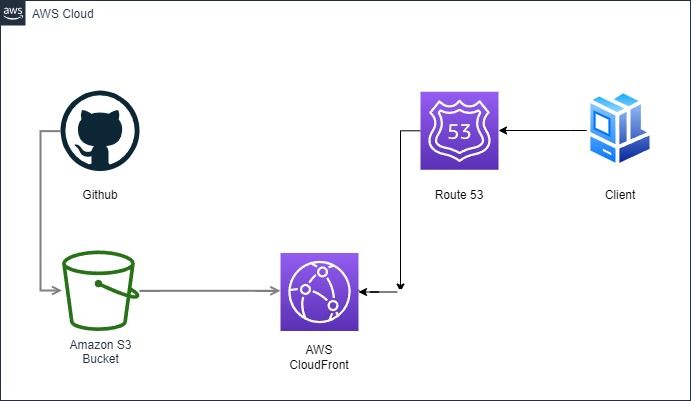
Let me explain the components.
Github: This is where the code lives, any changes that I make on my computer, are reflected in the repository on GitHub.
Amazon S3 Bucket: This is the bucket where we are going to put our files.
AWS CloudFront: This component is used to serve what we have in the s3 bucket.
Route 53: This is where my domain (vandroogenbroeck.net) domain is living, is my DNS "manager".
How to...
Create the AWS s3 Bucket
Ok, it's time to get our hands dirty.
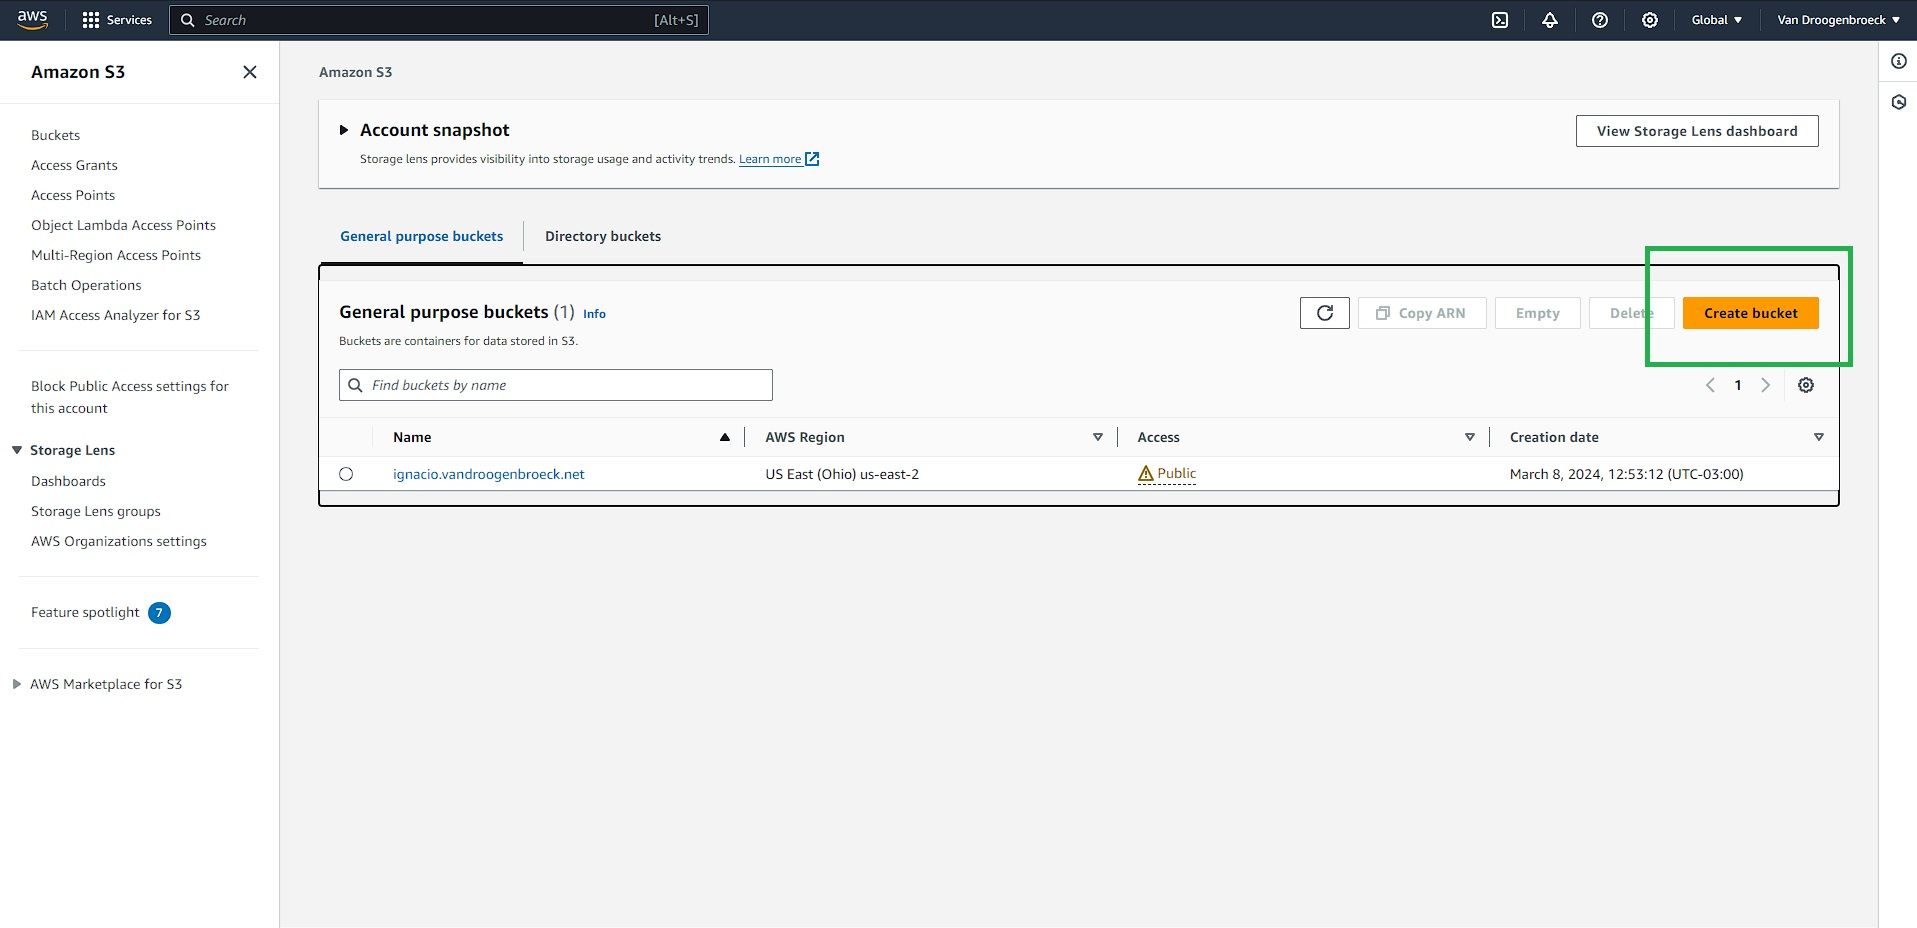
First, let's create a bucket in S3.
Go to your console and click on "Create Bucket"
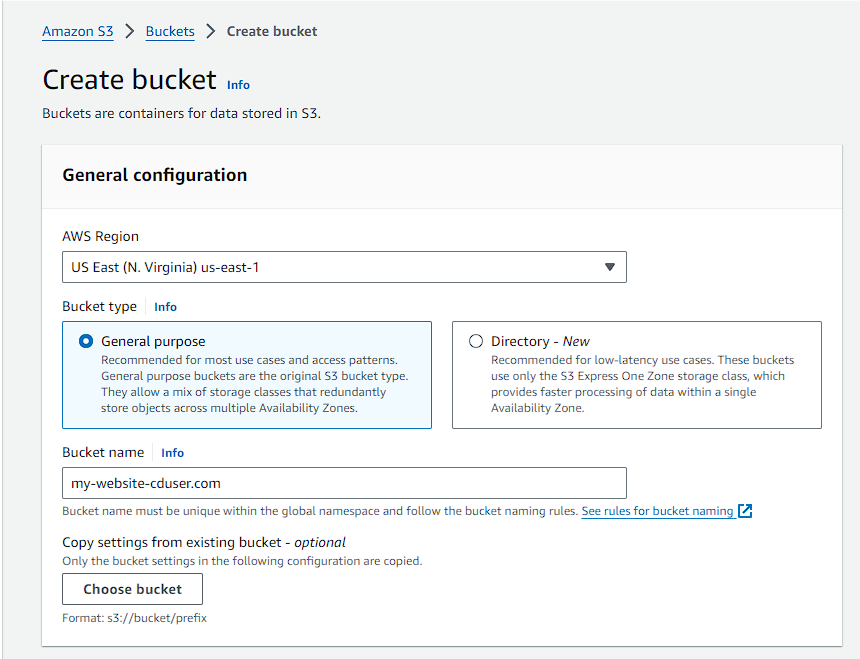
The next steps are the following:
Select the region: In my case, my visitors came from EMEA and the US, so US-east-1 makes sense to me.
Bucket type: General Purpose
Bucket Name: Specify a name for your bucket.
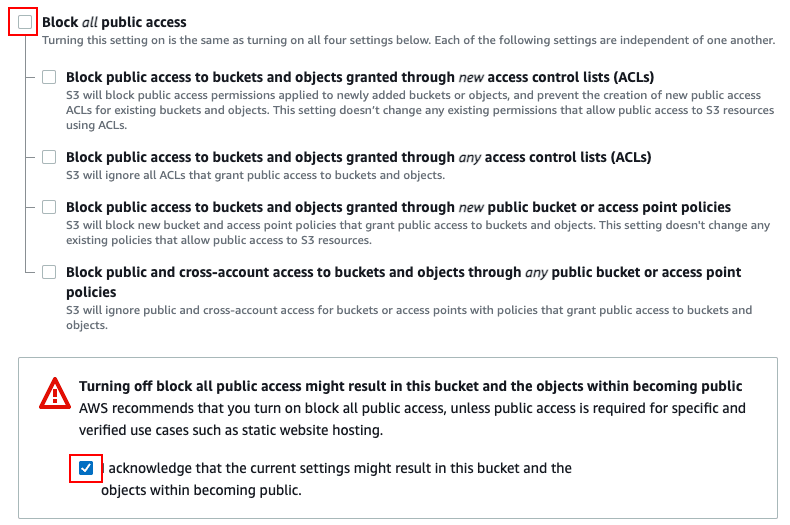
Then, disable "Block all public access" as appears in the following image and click the tickbox acknowledging you are going to open your s3 bucket to the world.
For the rest of the settings, leave those as default. Click on "Create Bucket" and then your new shiny bucket should appear...
The following things in adding some rules to allow "get" files from your s3 Bucket. To do that, we are going to open the bucket, click on the tab permissions, and click on "Edit bucket policy" Then you can paste this. Don't forget to change this using your bucket name.
{
"Version": "2012-10-17",
"Statement": [
{
"Sid": "AddPerm",
"Effect": "Allow",
"Principal": "*",
"Action": "s3:GetObject",
"Resource": "arn:aws:s3:::your_bucket_name/*"
}
]
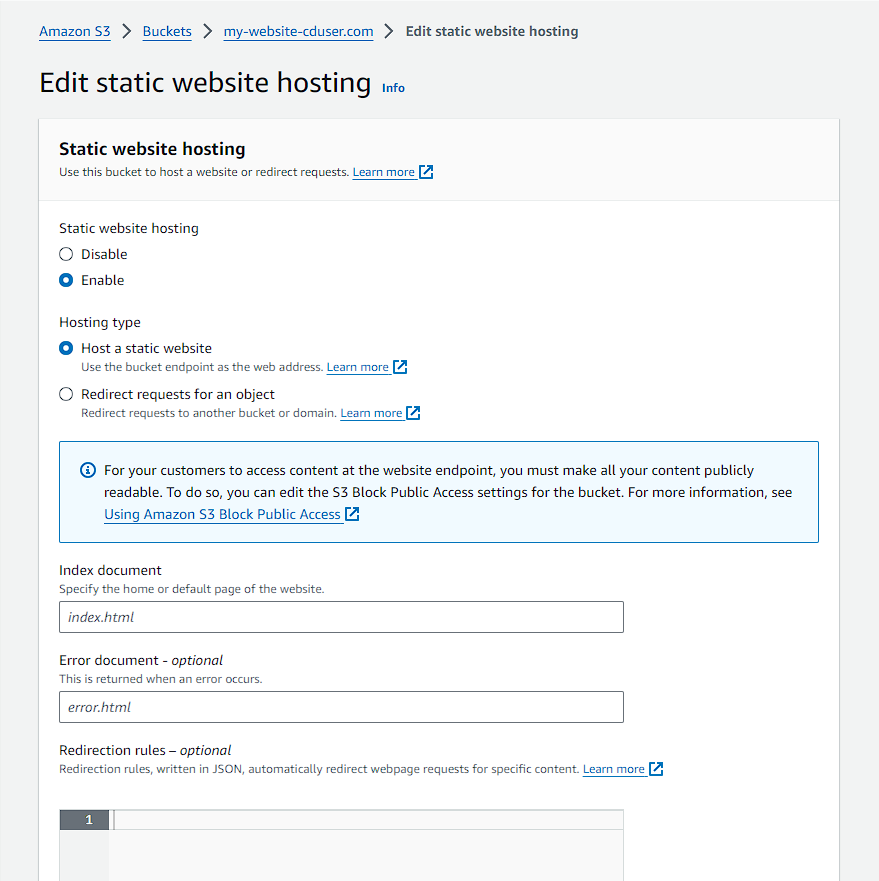
}Once you have that done, go to the tab "Properties" and scroll down to "Static website hosting", edit, and select "Enable". Specify the index of your website, and the error if you have a 404 error page in your project. Scroll down and click on "Save Changes".
Now, when everything is saved, you will see something like this. Of course, with your own URL.

Connect Github Repo and push the site to S3
For this case, we are going to use Github actions to automate the deployment to s3 in every push to our repo.
The steps here are very straightforward:
- Create a New Workflow File: In your GitHub repository, create a new file in the
.github/workflowsdirectory. You might name itdeploy-to-s3.yml. - Add the Workflow Configuration: Paste the following YAML configuration into the file. Make sure to replace
YOUR_S3_BUCKET_NAMEwith the name of your S3 bucket.
We are going to use this recipe:
name: Deploy to S3

on:
  push:
    branches:
      - main  # Set this to your default branch

jobs:
  deploy:
    runs-on: ubuntu-latest

    steps:
    - uses: actions/checkout@v4

    - uses: jakejarvis/s3-sync-action@master
      with:
        args: --follow-symlinks --delete
      env:
        AWS_S3_BUCKET: my-website-cduser.com
        AWS_ACCESS_KEY_ID: ${{ secrets.AWS_ACCESS_KEY_ID }}
        AWS_SECRET_ACCESS_KEY: ${{ secrets.AWS_SECRET_ACCESS_KEY }}
        AWS_REGION: 'us-east-1'  # Set this to your AWS region
        SOURCE_DIR: './'  # Set this to the directory of your static site
Please, do not hardcode your credentials, use GitHub options to securely provide your credentials.

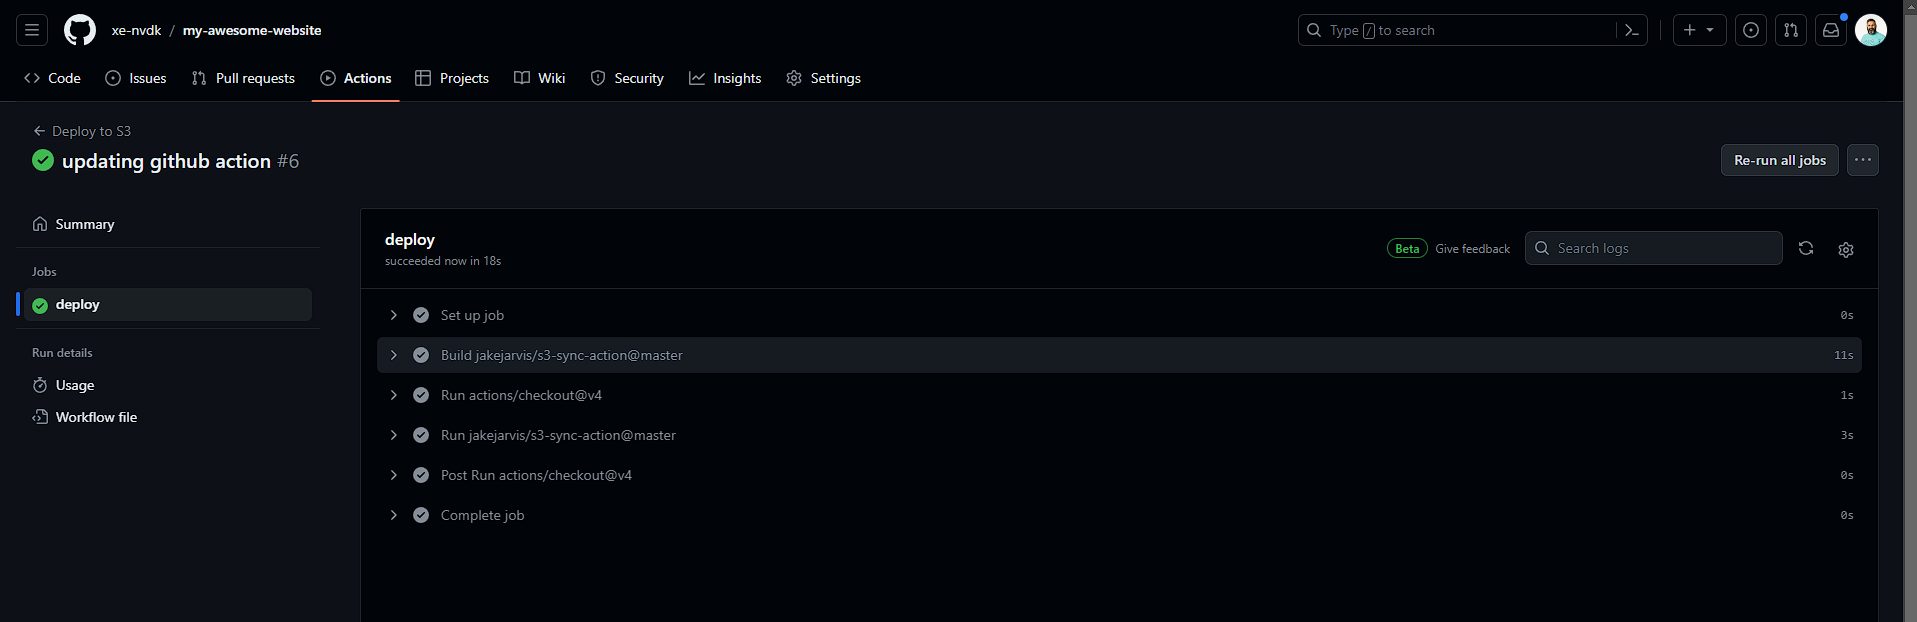
Now, that we have everything set, let's push our website or the changes and see what happens with the GitHub Action.
If everything goes well, you will see something like this.
And when you visit the URL for your bucket, you will start to see your website. In my case, you can go here:

As you can see the URL is something like this:
http://my-website-cduser.com.s3-website-us-east-1.amazonaws.com/You can share this now, but is not nice, also, we want our site to be available near to every visitor, and for that, we are going to use AWS CloudFront.
Distributing our website content with AWS CloudFront.
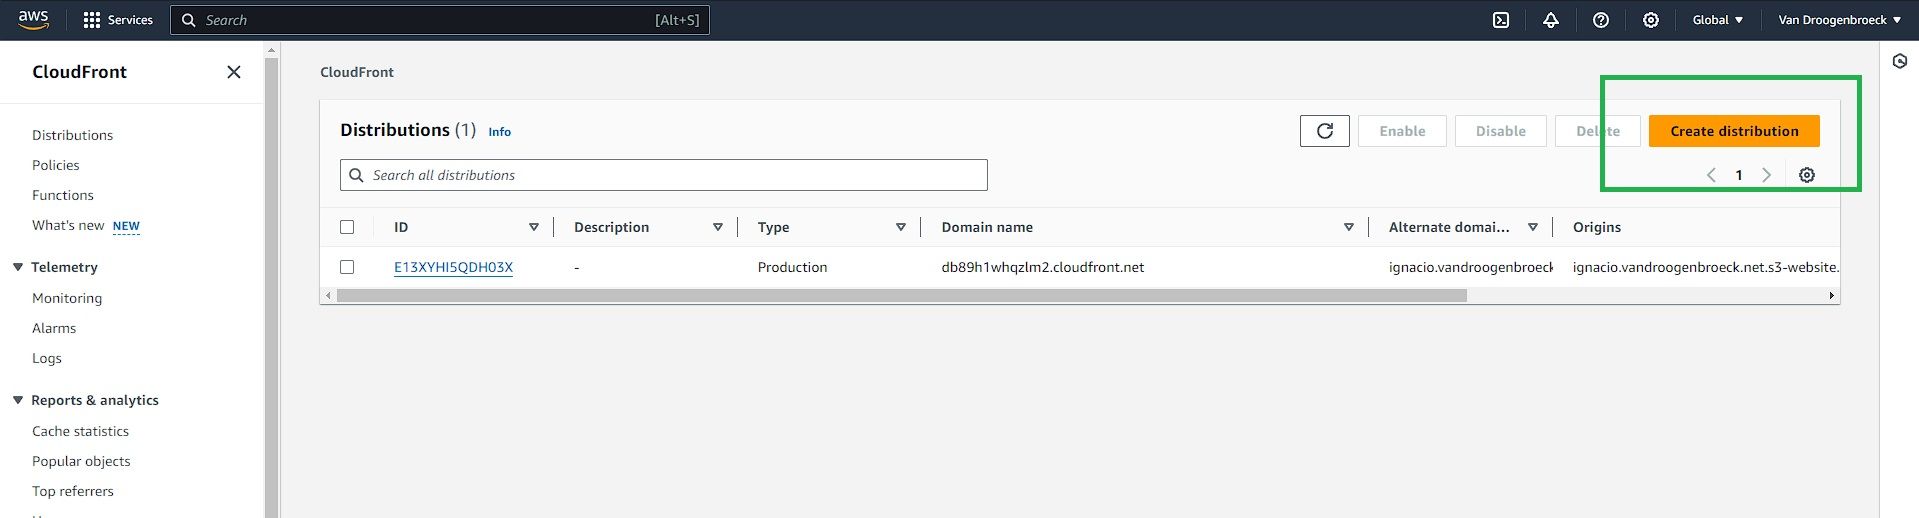
Ok, we are in the last step of the first part of this tutorial. Now. We are going to make use of the CDN that offers CloudFront to make our site available with good performance from several places.
In CloudFront, we are going to click on "create distribution"
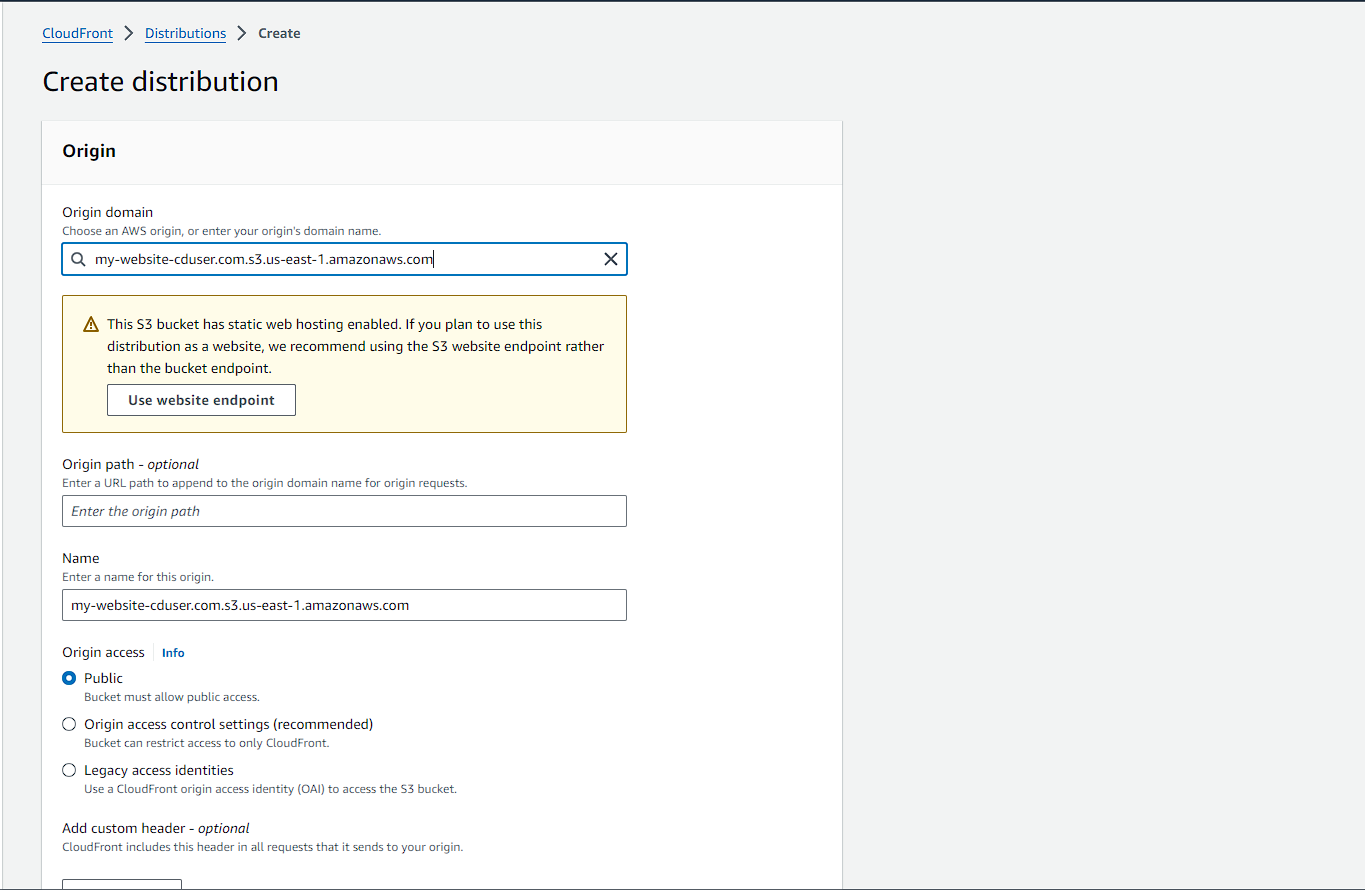
In the next step, at the origin domain, we are going to select our S3 bucket and we are going to click on "Use website endpoint".
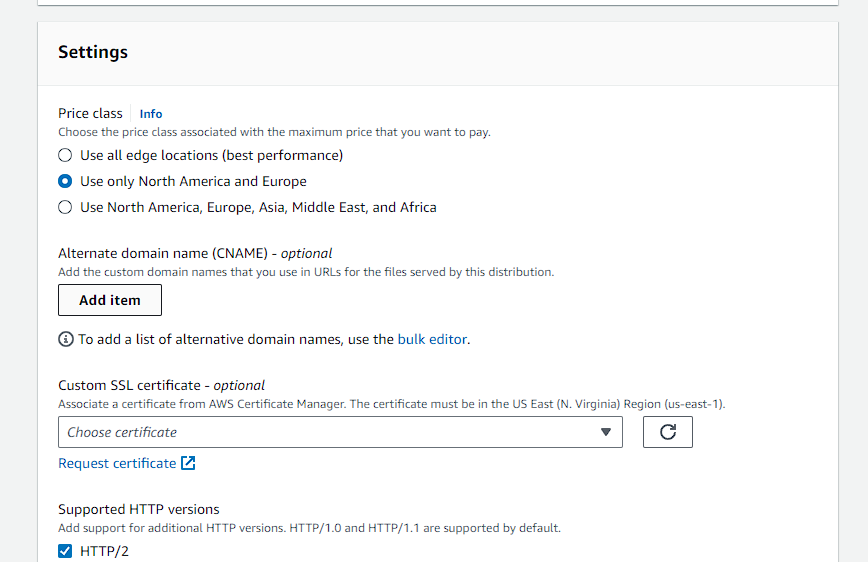
The following is almost by default. We are not going to enable WAF and the cache settings, we are going to stick to the recommended settings.
Depending on your needs, you can make your site available in all locations, in my case is not needed, only in North America and Europe is enough.
Click on "Create Distribution" at the bottom of the page, and now, we need to wait a few minutes but we can see what is the URL that we have assigned for this distribution.
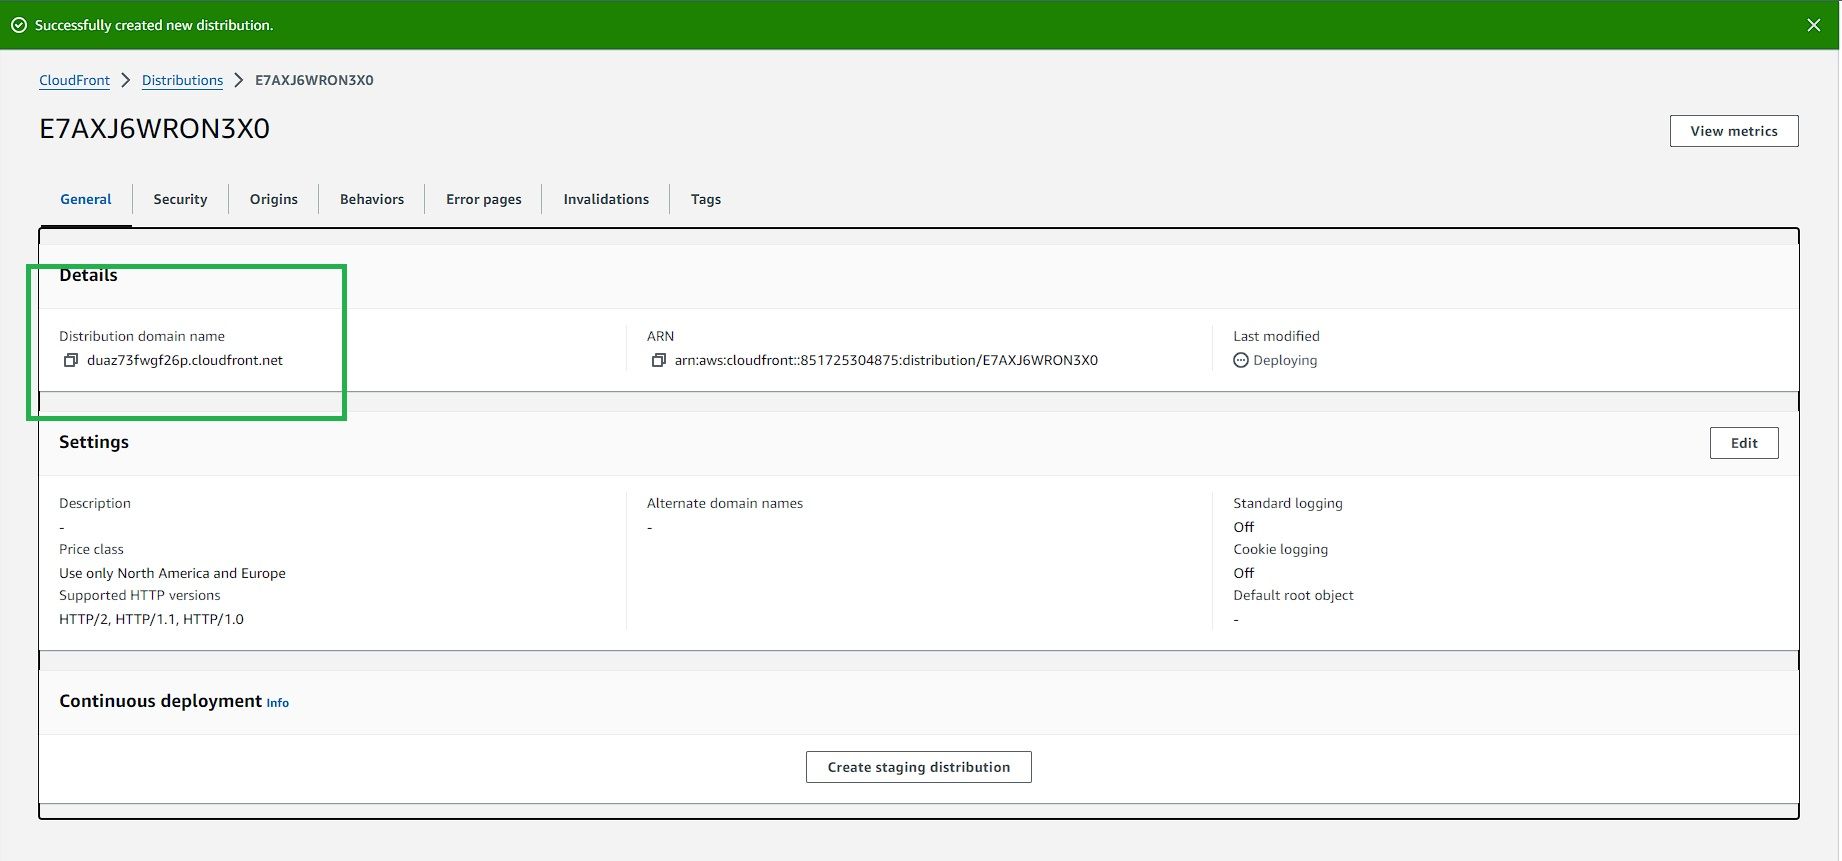
Once this is done, you can browse this and you will see what is served from S3.
https://duaz73fwgf26p.cloudfront.net/To conclude
In this first part of this tutorial, you saw how to create an AWS s3 bucket, also, how to push your repo on GitHub to that S3 bucket, and also, you learned how to create a distribution of your content using AWS CloudFront.
In the next part, we are going to see how to configure a DNS in Route 53, how to create a free Amazon certificate to enable SSL, and of course use your domain.
The cost of this setup is going to depend on how many people are visiting your website, CloudFront and S3 have generous free tiers that I think that is more than enough for a personal website.
Stay tuned for part 2 coming soon.